MY second entry to the TinkerCad Easter challenge.

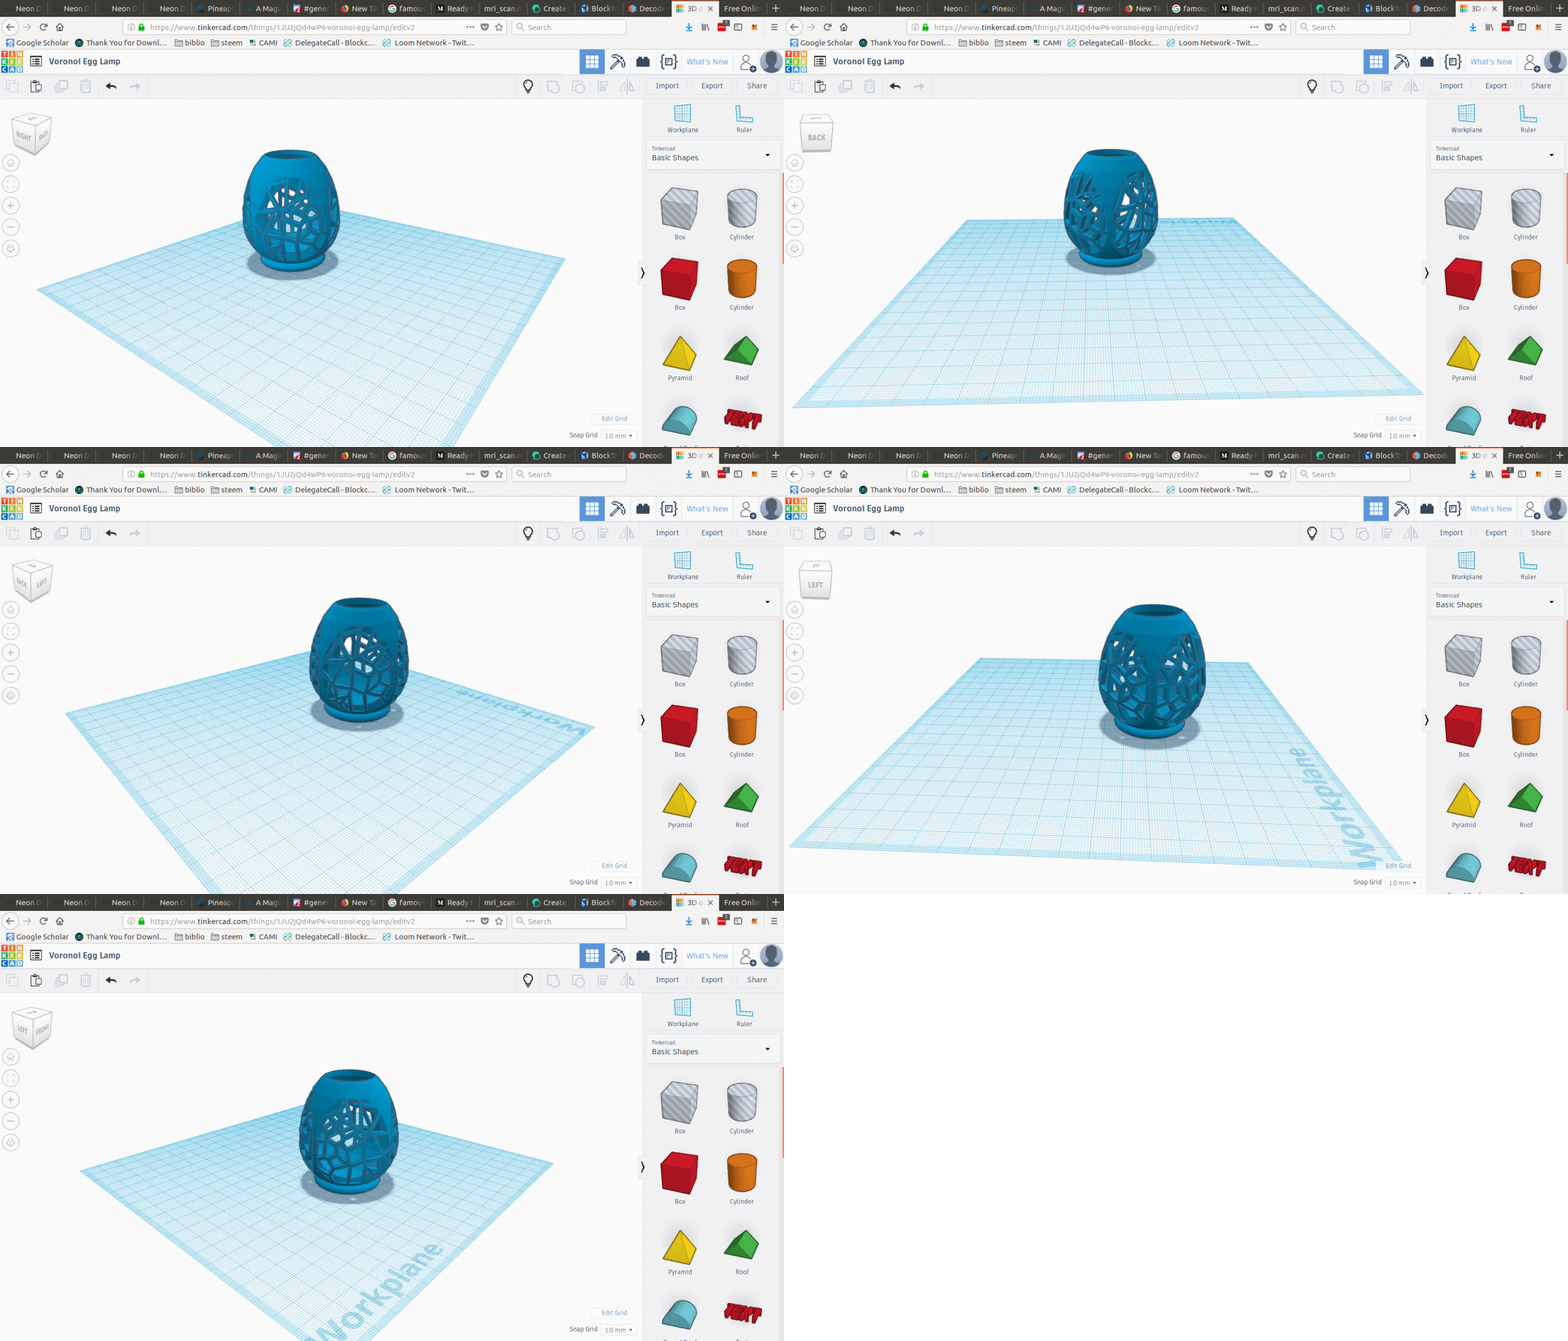
This design demonstrates using the Voronoi shape (A custom shape generator created by another user of TinkerCad) to Create a "lamp", complete with stand and an opening in the top.
Voronoi shape
To being with, we create a new project and navigate to the Shape Generator category, where we find the Voronoi shape.
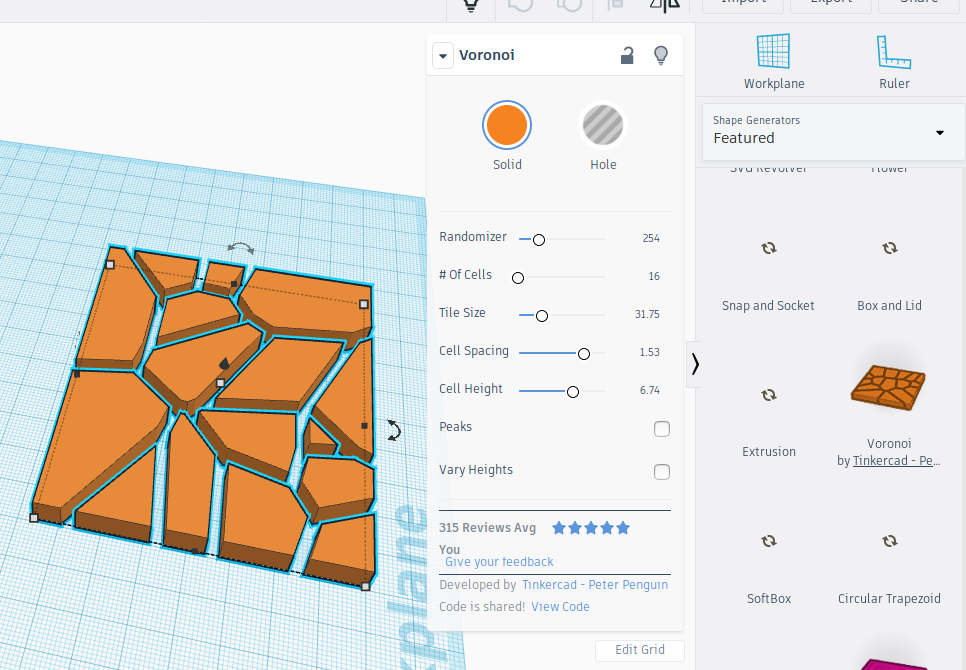
As you can see, there are a lot of options available to customize the shape. given we want this to be 3D printable, I've made relatively large gaps between the fragments of our tile.
We can then change our Voronoi Tile into a Hole.
Holes are specific tools in Tinkercad that can be grouped together with a solid object to remove the parts of the solid object that are overlapped by the hole.
It's a nifty feature, though I personally would have liked the ability to manipulate the meshes composing the item, too.
Ah well, we must adapt to the tools we're given !

Creating a hollow egg shape
This is really just the application of a slightly scaled down copy of the egg shape, in the form of a Hole, to the very middle of the egg shape.
Let me demonstrate:
First, we get our egg, and a copy in the form of a hole.

Then, using the options displayed if you press on the Solid icon, we change the solid egg to a transparent version, to be able to see our work.

We then scale down the egg Hole, and use the Align ( ) tool to place one inside the other.
Now we can Group ( ) the objects together.
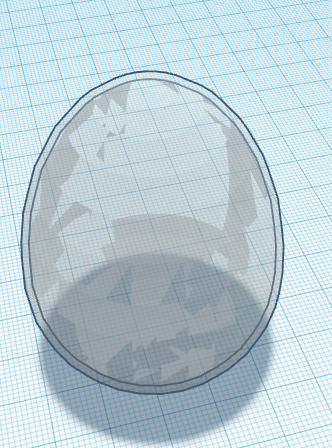
Voronoi Holing the hollow egg.
After switching the now-hollow egg back to a solid color, I go and grab our Voronoi plates, and rotate them by 90 degrees in a few directions till we get this:

4 copies of the Voronoi hole, each going into the hollow egg shape.
Here's what we get when Grouping those 5 objects together (take note I already added a square and ring shape at the bottom, for print stability)
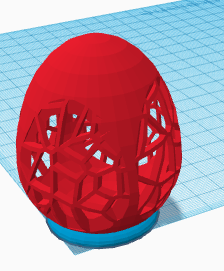
making the top opening
This is pretty simple, and you should have a handle on it.
Just a cylinder centered using Align to be in the top middle of the "egg", then made into a hole and Grouped.
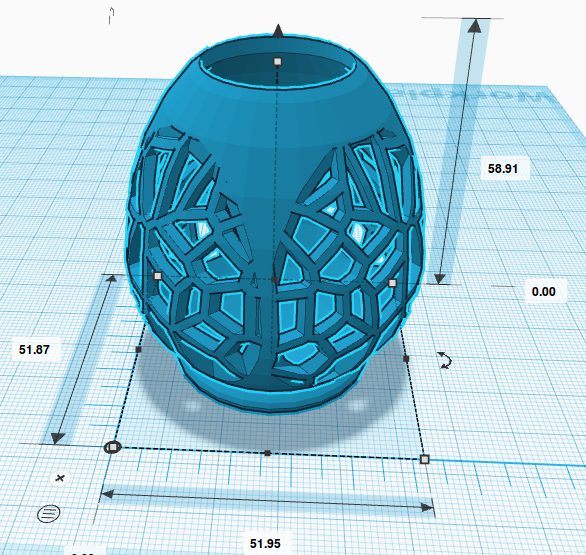
As you can see, I've added a Ruler (a tool that simply allows me to know the exact dimensions of my object, and it's distance in all axes from the ruler's centerpoint) so as to display the size in MM of the object.
It can of course be resized to whatever size you want :)
Honestly, I'm a bit frustrated at not being able to Voronoi an custom shape. Might have to look more into TinkerCad's Shape Generators, see if I can't create a custom generator just for my purposes.
One of my future projects for the EasterCad ;) competition is to attempt to use a custom shape generator on, say, the entire surface of an egg, and the hollow it out and put a solid version of a bunny inside XD
I hope you liked this model and small tutorial/intro to TinkerCad :)
Here's the link to the 3D object on MyMiniFactory.
All the images above, as well as the model itself, are released under a CC BY SA license

Congratulations! This post has been upvoted by SteemMakers. We are a community based project that aims to support makers and DIYers on the blockchain in every way possible. Find out more about us on our website: www.steemmakers.com.
If you like our work, please consider upvoting this comment to support the growth of our community. Thank you.
Downvoting a post can decrease pending rewards and make it less visible. Common reasons:
Submit
You've received an upvote from @slothicorn! Click Here to Learn More
(@playitforward)
Downvoting a post can decrease pending rewards and make it less visible. Common reasons:
Submit